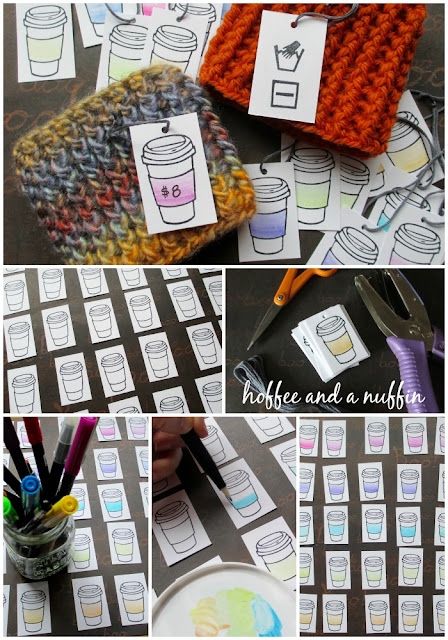
With a few basic supplies and less than an hour of your time, you can make about 30 tags for your handmade coffee sleeves.
Make them any way your heart desires. Here, I'll explain how I made mine. Gather your supplies:
card stock
Make them any way your heart desires. Here, I'll explain how I made mine. Gather your supplies:
card stock
ink
paper cutter
1/8 inch hole punch
pen/marker
Tombow brush pens and blender pen (optional)
colored card stock (optional)
scissors
thread, yarn, or embroidery floss
I cut my paper down to tags measuring 2" x 1 1/4". At this size I was able to get 30 tags from one 8 1/2" x 11" piece of card stock.
After they were cut, I stamped my coffee cup with sleeve rubber stamp on one side (closer to the bottom than the center to allow a little room for the hole at the top of the tag.)
Using my Tombow brush pen I added some color with an ombre effect to my sleeves for a simple bit of color. It worked up rather quickly and I was finished with that part in only a couple of minutes. If you enjoy painting, the same effect could be achieved with watercolors. Of course, you don't have to get super fancy with your sleeve. Let your imagination steer your project in the direction of your own style. Make it unique to YOU.
When the decorating was done, I punched a hole at the top of each tag. I discovered that if I cut a skein of embroidery floss at each end (cut through ALL of the loops!) I was left with a pile of 6" pieces of thread to attach to my cards. Those were finished with a basic overhand knot.
I wrote the price on the sleeve with my trusty Staedtler pigment pen then stamped care information, hand wash and dry flat, on the backside using my laundry care stamps.
That's it! Or...
If you're like me you've got stashes of bits of card stock that you just couldn't bring yourself to throw away. You know, because SOME DAY you'll need those bits of pretty paper. Well, this is it. This is what you've been saving those for. If you want to make "fancy" tags, maybe for a birthday gift, or a shower gift, or a "just because" gift, all you need to do is stamp the coffee cup with sleeve rubber stamp onto those bits of pretty paper, then cut out the sleeve portion and attach it to your card with a bit of glue. How cool is that? And simple, too!
Either way you make these tags, you'll be sure to receive compliments on them. Have fun and HAPPY CRAFTING!


No comments:
Post a Comment